实习准备,需要了解一下Thrift,在此做简单记录。
微服务
优势
- 独立缩放。每一个服务的缩放可用三个轴来表示。x轴-水平可扩展,即某个服务器上的某个服务是否可以在其他服务器中同样部署;y-轴,业务可扩展,加入某个服务为UserService,其中包含很多账户相关信息,是否可抽离出AccountService;z-轴,数据可扩展,每个服务是否可以独立使用自己的一个数据库;
- 独立发布和部署。遇到bug或者新版本发布,只部署对应服务即可,不必重新部署整个应用程序。
- 独立开发。每个服务有自己的代码库,开发人员可专注于一项服务,只关注较小范围。
- 优雅降级。如果服务崩溃,其影响不会涉及到其他服务,不会导致整个应用程序发生灾难性故障。
- 分散治理。每个服务的开发人员可以选择自己独立的技术栈,指定最合适的策略。
RPC
远程过程调用,其实就是实现某台机器调用另一台远程机器上的接口的技术手段。RPC框架所做的就是实现客户端调用服务器接口这个通信过程。
Thrift
简介
Thrift是一个FaceBook开源的高效RPC框架,其主要特点是跨语言及二进制高效传输(当然,除了二进制,也支持json等常用序列化机制)。
跨语言通常有二种做法,
一是将其它语言转换成某种主流的通用语言。
二是先定义一种规范文件(可以简单的理解为『母版』),然后由特定的编译器,将『母版』直接编译成目标语言的源代码。
Thrift走的是第二条路,使用Thrift框架时,先定义名为.thrift后缀的文件,然后由thrift编译器编译成指定语言的源文件,然后借助thrift提供的各种语言的实现lib库,完成RPC的调用。
安装
Windows下安装:
http://thrift.apache.org/docs/install/windows 这是官网的windows安装指导说明,windows的安装其实最简单
官网: http://thrift.apache.org/download。
下载这二个文件即可,第1个是编译器,第2个压缩包里包括了种示例代码。把thrift-0.13.0.exe保存到某个目录,比如:E:\Thrift下,然后将thrift-0.13.0.exe改个简单的名字,比如:thrift.exe(这一步非必须),最后在环境变量的path路径里,把E:\Thrift加上,保证Command窗口下,键入thrift - version能输出对应版本。
centos 安装 :
http://thrift.apache.org/docs/install/centos 参考这个安装,上面的详细的命令,按上面的命令一步步来就行了,主要过程是先安装一堆依赖的工具,然后
git clone https://git-wip-us.apache.org/repos/asf/thrift.git
将thrift源代码拉到本地,再build,生成thrift编译器
mac osx 安装:
http://thrift.apache.org/docs/install/os_x 参考这里,大概步骤跟centos差不多,相信大家都能搞定,唯一要注意的是,mac os上没有yum之类的工具,建议使用brew 工具安装
使用步骤
demo样例参考:https://juejin.im/post/5afa19bf51882542653995b7
- IDEA中Thrift插件配置
- IDEA-Plugins安装
Thrift Support插件,安装之后重启,Compiler中出现Thrift compiler即为安装成功。
- 创建Thrift项目并编译生成RPC接口
新建Thrift工程:
new project–Intellij Platform Plugin–Thrift,(下一步选做,个人没成功)项目创建完成以后,在 Project Settings 中设置好 Facets 的 Thrift配置,添加一个 Java的Generator,在弹出的对话框中配置好 Output folder 路径,该路径用于存放由 thrift文件 转化而成的 java源文件。在thrift工程的src目录下创建thrift接口文件:
RPCDateService.thrift1
2
3
4namespace java com.hansonwang99.thrift.interface
service RPCDateService{
string getDate(1:string userName)
}在该接口文件中,我们定义了一个 提供日期的Service,让客户端能通过该接口查询到服务器当前的时间
右击.thrift源文件,点击 Recompile ‘xxx.thrift’ 即可完成 thrift接口文件 —> java接口文件 的转换,生成的
xxx.java文件在上述第2步配置的output路径中,但是本人没有成功,故采用以下方法:命令行下先进入ThriftDemo\src\thrift所在目录,
thrift -r -gen java xxx.thrift这样同样可以生成xxx.java文件
- 开发ThriftAPI接口
新建一个maven项目:ThriftAPI,pom.xml中添加thrift依赖
1
2
3
4
5
6
7<dependencies>
<dependency>
<groupId>org.apache.thrift</groupId>
<artifactId>libthrift</artifactId>
<version>0.11.0</version>
</dependency>
</dependencies>添加java文件,将thrift文件编译生成的com/xxx/xxx.java文件夹整体拷贝到maven项目的java文件夹下
maven–Lifecycle–package进行打包,生成jar包,注意这里需要在Project Structure中将jdk、modules等对应的版本都切换为1.8,本人系统默认的JDK11会出现问题。因为接下来的server和client两份工程中的maven要引入该依赖,所以需要将生成的jar包添加到本地mvn仓库中(http://www.lwqgj.cn/771.html中的(二)):
安装maven,这里不再具体阐述,下载-解压-添加环境变量(https://www.jianshu.com/p/62a76daf5096)
mvn命令将jar包添加到本地maven库
1
mvn install:install-file -Dfile=D:\Java\hansonwang99-SpringBoot_RPC_Thrift-master\SpringBoot_RPC_Thrift\ThriftAPI\target\ThriftAPI-1.0-SNAPSHOT.jar -DgroupId=com.hansonwang99 -DartifactId=ThriftAPI -Dversion=1.0-SNAPSHOT -Dpackaging=jar
其中,
-Dfile就是生成的jar包的路径,-DgroupID、-Dartifacted、-Dversion、-Dpackaging分别就是包路径、包名、包版本、打包方式,这些都要与ThriftAPI工程中pom.xml文件中的完全一致才可以。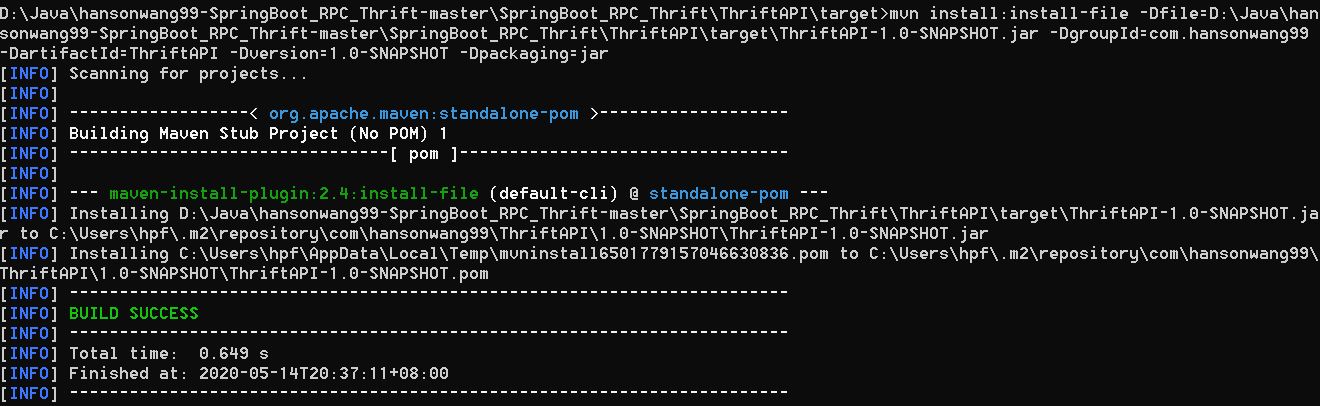
开发RPC服务端
利用SpringBoot来实现RPC服务端。
pom.xml文件中添加依赖
1
2
3
4
5
6
7
8
9
10
11<dependency>
<groupId>com.hansonwang99</groupId>
<artifactId>ThriftAPI</artifactId>
<version>1.0-SNAPSHOT</version>
</dependency>
<!-- 下方thrift的依赖原项目中没有,但是我这里不加会报错 -->
<dependency>
<groupId>org.apache.thrift</groupId>
<artifactId>libthrift</artifactId>
<version>0.11.0</version>
</dependency>创建Controller并实现RPC接口
1
2
3
4
5
6
7
8
9
10
public class RPCDateServiceImpl implements RPCDateService.Iface {
public String getDate(String userName) throws TException {
Date now=new Date();
SimpleDateFormat simpleDateFormat = new SimpleDateFormat("今天是"+"yyyy年MM月dd日 E kk点mm分");
String nowTime = simpleDateFormat.format( now );
return "Hello " + userName + "\n" + nowTime;
}
}这里将服务器当前时间以字符串形式返回给调用端!
编写RPCThriftServer:用于启动RPC服务器
1
2
3
4
5
6
7
8
9
10
11
12
13
14
15
16
17
18
19
20
21
22
23
24
25
26
27
28
29
30
31
32
33
34
35
36
37
38
39
40
public class RPCThriftServer {
protected final Logger logger = LoggerFactory.getLogger(this.getClass());
("${thrift.port}")
private int port;
("${thrift.minWorkerThreads}")
private int minThreads;
("${thrift.maxWorkerThreads}")
private int maxThreads;
private TBinaryProtocol.Factory protocolFactory;
private TTransportFactory transportFactory;
private RPCDateServiceImpl rpcDateService;
public void init() {
protocolFactory = new TBinaryProtocol.Factory();
transportFactory = new TTransportFactory();
}
public void start() {
RPCDateService.Processor processor = new RPCDateService.Processor<RPCDateService.Iface>( rpcDateService );
init();
try {
TServerTransport transport = new TServerSocket(port);
TThreadPoolServer.Args tArgs = new TThreadPoolServer.Args(transport);
tArgs.processor(processor);
tArgs.protocolFactory(protocolFactory);
tArgs.transportFactory(transportFactory);
tArgs.minWorkerThreads(minThreads);
tArgs.maxWorkerThreads(maxThreads);
TServer server = new TThreadPoolServer(tArgs);
logger.info("thrift服务启动成功, 端口={}", port);
server.serve();
} catch (Exception e) {
logger.error("thrift服务启动失败", e);
}
}
}创建SpringBootApplication
1
2
3
4
5
6
7
8
9
10
11
12
13
public class RPCThriftServerApplication {
private static RPCThriftServer rpcThriftServer;
public static void main(String[] args) {
ApplicationContext context = SpringApplication.run(RPCThriftServerApplication.class, args);
try {
rpcThriftServer = context.getBean(RPCThriftServer.class);
rpcThriftServer.start();
} catch (Exception e) {
e.printStackTrace();
}
}
}添加配置文件application.properties
1
2
3=6666
=10
=100让thrift服务起在6666端口。
开发RPC客户端
同样用SpringBoot来实现RPC客户端。
pom.xml中添加依赖,同服务器端。
编写RPCThriftClient:用于发出RPC调用,包括两部分。
RPCThriftClient.java如下:1
2
3
4
5
6
7
8
9
10
11
12
13
14
15
16
17
18
19
20
21
22
23
24
25
26
27
28
29
30
31
32
33
34
35
36
37
38public class RPCThriftClient {
private RPCDateService.Client client;
private TBinaryProtocol protocol;
private TSocket transport;
private String host;
private int port;
public String getHost() {
return host;
}
public void setHost(String host) {
this.host = host;
}
public int getPort() {
return port;
}
public void setPort(int port) {
this.port = port;
}
public void init() {
transport = new TSocket(host, port);
protocol = new TBinaryProtocol(transport);
client = new RPCDateService.Client(protocol);
}
public RPCDateService.Client getRPCThriftService() {
return client;
}
public void open() throws TTransportException {
transport.open();
}
public void close() {
transport.close();
}
}RPCThriftClientConfig.java是利用config生成bean:1
2
3
4
5
6
7
8
9
10
11
12
13
14
15
public class RPCThriftClientConfig {
("${thrift.host}")
private String host;
("${thrift.port}")
private int port;
(initMethod = "init")
public RPCThriftClient rpcThriftClient() {
RPCThriftClient rpcThriftClient = new RPCThriftClient();
rpcThriftClient.setHost(host);
rpcThriftClient.setPort(port);
return rpcThriftClient;
}
}编写Restful的Controller作为调用接口
1
2
3
4
5
6
7
8
9
10
11
12
13
14
15
16
17
18
19
20
("/hansonwang99")
public class RPCThriftContoller {
protected final Logger logger = LoggerFactory.getLogger(this.getClass());
private RPCThriftClient rpcThriftClient;
(value = "/thrift", method = RequestMethod.GET)
public String thriftTest(HttpServletRequest request, HttpServletResponse response) {
try {
rpcThriftClient.open();
return rpcThriftClient.getRPCThriftService().getDate("hansonwang99");
} catch (Exception e) {
logger.error("RPC调用失败", e);
return "error";
} finally {
rpcThriftClient.close();
}
}
}创建SpringBootApplication
1
2
3
4
5
6
public class RPCThriftClientApplication {
public static void main(String[] args) {
SpringApplication.run(RPCThriftClientApplication.class, args);
}
}添加配置文件application.properties
1
2
3
thrift.host=localhost
thrift.port=6666
server.port=9999
- 通信实验
- 分别启动服务器端和客户端的应用。
- 浏览器输入:
localhost:9999/hansonwang99/thrift即可查看客户端从服务端取回的服务器当前时间,说明RPC通信过程打通。
注:转载文章请注明出处,谢谢~