什么是JdbcTemplate
首先这里看一张图
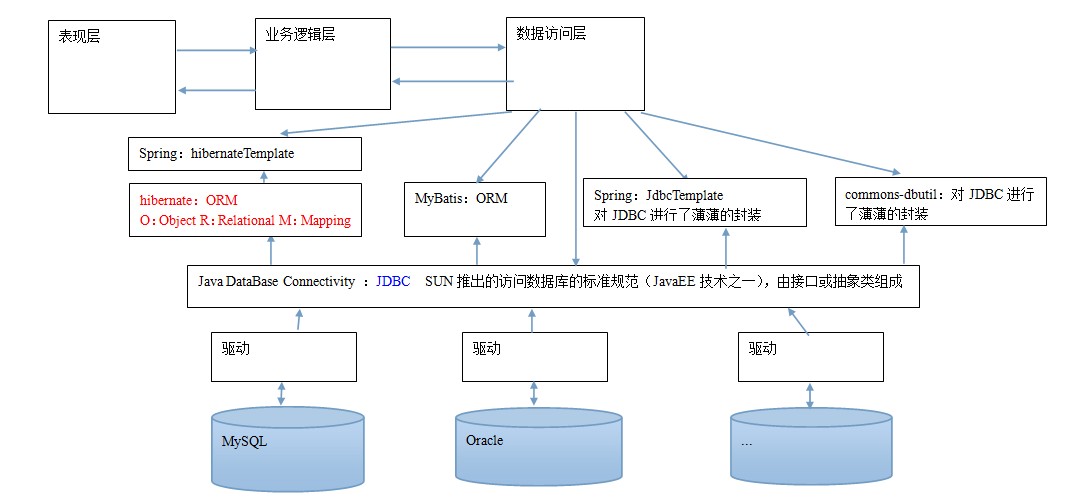
JdbcTemplate概述
它是spring框架中提供的一个对象,是对原始Jdbc API对象的简单封装。spring框架为我们提供了很多的操作模板类。
操作关系型数据的: JdbcTemplate HibernateTemplate
操作nosql数据库的: RedisTemplate
操作消息队列的: JmsTemplate
我们今天的主角在spring-jdbc-5.2.0.RELEASE.jar中,我们在导包的时候,除了要导入这个jar包外,还需要导入一个spring-tx-5.2.0.RELEASE.jar(它是和事务相关的)。
创建与使用
最基本方法
1 | package com.gsynf.jdbctemplate; |
使用IoC配置
1 | <!--配置JdbcTemplate--> |
1 | package com.gsynf.jdbctemplate; |
实现CRUD操作
1 | package com.gsynf.jdbctemplate; |
在Dao中的使用
1 | package com.gsynf.dao.impl; |
1 | package com.gsynf.jdbctemplate; |
Spring中的事务控制
Spring事务控制要明确的
第一:JavaEE体系进行分层开发,事务处理位于业务层,Spring提供了分层设计业务层的事务处理解决方案。
第二:spring框架为我们提供了一组事务控制的接口。具体在后面介绍。这组接口是在spring-tx-5.0.2.RELEASE.jar中。
第三:spring的事务控制都是基于AOP的,它既可以使用编程的方式实现,也可以使用配置的方式实现。我们学习的重点是使用配置的方式实现。
基于XML
1 |
|
基于注解
1 |
|
1 | package com.gsynf.service.impl; |
基于纯注解
和基于注解相比,主要变化:
新建config包,下有SpringConfiguration/JdbcConfig/TransactionConfig,
1 | package config; |
1 | package config; |
1 | package config; |
resource下新建JdbcConfig.properties,
1 | =com.mysql.jdbc.Driver |
Test中修改
1 | (classes = SpringConfiguration.class) |
注:转载文章请注明出处,谢谢~